
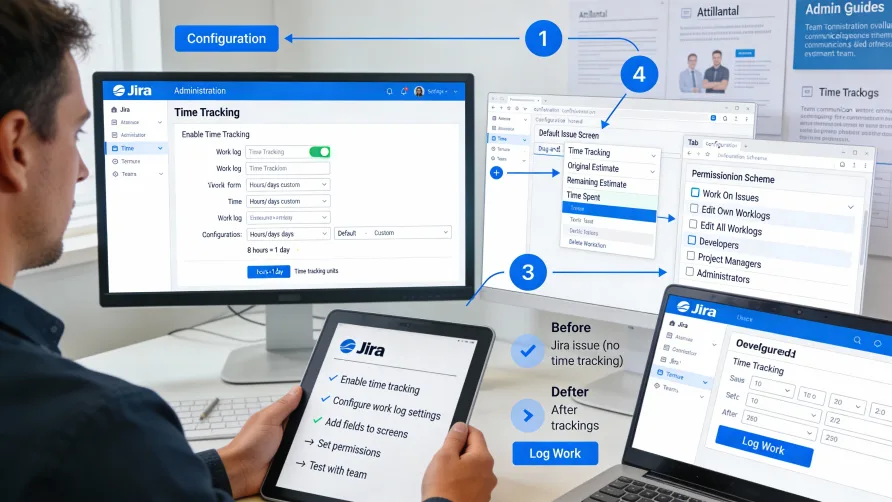
Setting up time tracking in Jira requires configuration at both the global Jira instance level and within individual projects. The process involves enabling time tracking features, configuring how time is displayed and tracked, adding necessary fields to issue screens, and setting permissions that control who can view and log time.
This guide walks through the complete setup process from initial configuration through final testing, helping Jira administrators implement time tracking that works for their teams.
How Do I Enable Time Logging in Jira?
Time tracking in Jira is typically enabled by default in most Jira installations, but the features may not be visible or accessible until properly configured. The setup process differs slightly between Jira Cloud and Jira Server/Data Center versions, though the core concepts remain consistent.
For Jira Cloud, you'll configure time tracking through the Jira settings accessed from the gear icon in the top navigation. Navigate to System settings, then select Time tracking under the Advanced section. This area controls global time tracking configuration for your Jira Cloud instance.
For Jira Server or Data Center, you access time tracking configuration through the Administration menu, then System settings. The Time tracking section appears under General Configuration where you configure how time tracking behaves across your Jira instance.
The time tracking configuration page controls several key settings that affect how time tracking works throughout Jira. Understanding these settings helps you configure time tracking to match your organization's needs.
Configuring Time Tracking Settings
Time Format Settings
Jira needs to know how you want to represent time values. The time format setting determines what units you'll use for estimates and time logging. You have two primary options: pretty format or days/hours format.
Pretty format displays time using human-readable expressions like "2 hours" or "3 days, 4 hours". This format feels natural and is easy for team members to understand without converting between units.
Days/hours format uses strict hour-based calculations where you define how many hours constitute a working day and week. This precision helps with capacity planning and resource management when you need exact hour calculations.
For most teams, pretty format works well because it's intuitive and doesn't require understanding of how many hours equal a day. However, organizations with strict capacity planning requirements often prefer days/hours format for its precision.
Working Hours Configuration
If you choose days/hours format, you must define how many hours constitute a working day and working week. These values affect how Jira converts between hours, days, and weeks in time calculations.
Common configurations include 8 hours per day and 40 hours per week, but you can adjust these to match your organization's standard working hours. If your team works 7.5 hour days, configure that value so time calculations reflect your reality.
These settings only matter when using days or weeks as time units. If you stick to hours and minutes exclusively, the working hours configuration doesn't affect your time tracking.
Default Unit
You can specify a default time unit that Jira uses when team members enter numbers without units. This setting helps streamline time entry by letting users type just "2" instead of "2h" if hours are your standard unit.
Most organizations set hours as the default unit since it's the most commonly used time measure. This setting reduces keystrokes and makes time entry faster for team members.
Adding Time Tracking Fields to Screens
Time tracking fields must appear on issue screens for team members to log time and see time tracking information. Jira's screen configuration determines which fields appear when creating, editing, or viewing issues.
Understanding Jira Screens
Jira uses three types of screens for issues: create screens (shown when creating new issues), edit screens (shown when editing existing issues), and view screens (shown when viewing issue details). Time tracking fields need to appear on appropriate screens for your workflow.
Screen configuration happens at the project level or through screen schemes that multiple projects share. You'll need to access the screen configuration for projects where you want time tracking enabled.
Navigate to Project settings, then Screens. You'll see the screens associated with your project and can edit them to add time tracking fields.
Time Tracking Field
The primary "Time Tracking" field shows the summary of original estimate, time spent, and remaining estimate on issue screens. Add this field to your view and edit screens so users can see time tracking status and update estimates.
When this field appears on the view screen, team members see the time tracking bar that visualizes progress. The bar shows estimated time versus actual time spent, providing quick visual feedback about whether issues are tracking as expected.
On edit screens, the time tracking field lets users update original estimates and remaining estimates. However, actual time logging happens through the work log interface rather than directly through this field.
Original Estimate Field
The original estimate field captures how long you initially think an issue will take. This field typically appears on create screens so estimates can be set when issues are created, and on edit screens so estimates can be adjusted if initial estimates prove inaccurate.
Setting original estimates during issue creation supports sprint planning and project scheduling. Teams can size issues before committing to them, helping with capacity planning.
Remaining Estimate Field
The remaining estimate field shows how much time you think is left on an issue. This field appears on edit screens so users can update remaining estimates as work progresses and more information becomes available.
Remaining estimates help track progress and predict completion dates. As team members work on issues, they should update remaining estimates to reflect current expectations, even if those differ from original estimates.
Time Spent Field
The time spent field displays the sum of all work log entries on an issue. This field is typically view-only since time spent accumulates automatically as team members log work.
Add the time spent field to view screens so team members can see total time investment on issues without opening the work log. This visibility helps everyone understand how much effort issues have consumed.
Configuring Work Log Settings
Work logs are the individual time entries that team members create to record time spent on issues. Configuring work log behavior affects how time logging works across your Jira instance.
Work Log Visibility
Jira lets you control work log visibility at the instance level or per work log entry. Work logs can be visible to all users, restricted to specific groups or roles, or configured differently for each entry.
Many organizations make work logs visible to all users with access to issues, promoting transparency about how time is spent. However, some businesses restrict work log visibility to managers or specific roles for privacy or confidentiality reasons.
Configure default work log visibility through permission schemes, which control what users can see and do within projects. You can set different visibility rules for different projects based on their needs.
Work Log Time Format
Work logs accept time in various formats including minutes (60m), hours (2h), days (1d), and weeks (1w). Your time format configuration determines how these values convert and display.
Communicate to your team which time formats they should use. Some organizations standardize on hours for consistency, while others let team members choose whatever feels natural for the duration they're logging.
Required Work Log Fields
You can require certain information when logging work. Common requirements include a description of what was accomplished during the logged time or specifying when the work occurred.
Requiring descriptions improves work log usefulness. When reviewing time later, descriptions provide context about what consumed hours, helping with project analysis and understanding productivity.
Balance requirements against user friction. Every required field adds steps to time logging, which can reduce compliance if the process becomes too burdensome.
Setting Time Tracking Permissions
Jira's permission scheme controls who can view time tracking information and who can log work. Proper permission configuration ensures appropriate access while maintaining security and privacy.
Browse Project and View Issues Permissions
These basic permissions determine who can see issues in projects. Users need at least these permissions to view any issue information including time tracking data on those issues.
If users can't view issues, they won't see time tracking information regardless of more specific time tracking permissions.
Work On Issues Permission
The "Work On Issues" permission controls who can log work against issues. Users need this permission to create work log entries recording time spent.
This permission is typically granted to team members who actively work on issues and need to track their time. Managers, stakeholders, and other viewers who don't log time themselves don't need this permission.
Edit Own Worklogs and Edit All Worklogs
These permissions control who can modify work log entries after they're created. "Edit Own Worklogs" lets users edit their own time entries, while "Edit All Worklogs" lets users edit anyone's time entries.
Most organizations grant "Edit Own Worklogs" broadly so team members can correct mistakes in their time entries. "Edit All Worklogs" is typically restricted to managers or administrators who need to make corrections to other people's time.
Delete Own Worklogs and Delete All Worklogs
Similar to edit permissions, delete permissions control who can remove work log entries. "Delete Own Worklogs" lets users delete their own entries, while "Delete All Worklogs" allows deletion of anyone's work logs.
Some organizations don't grant delete permissions at all, preferring that incorrect work logs be edited rather than deleted to maintain audit trails. Others allow deletion of own work logs for recent entries but restrict deletion after a certain period.
Project-Level Time Tracking Configuration
After configuring global time tracking settings, verify that individual projects have time tracking properly enabled and configured.
Project Time Tracking Settings
Some project settings affect time tracking behavior within that specific project. Access project settings through the project sidebar, then look for time tracking or work log related options.
Verify that the project uses appropriate screen schemes that include time tracking fields. Check that issue types in the project display time tracking fields on their screens.
Issue Type Screen Schemes
Different issue types within projects can use different screens. Verify that issue types where you want time tracking (such as Tasks, Stories, or Bugs) include screens with time tracking fields.
If certain issue types shouldn't have time tracking, you can exclude time tracking fields from their screens. This selective approach works when only certain work types require time tracking.
Testing Time Tracking Configuration
After configuration, test time tracking to ensure it works as expected before rolling it out to your team.
Create Test Issues
Create issues in your project and verify that time tracking fields appear on create screens where expected. Check that you can set original estimates during issue creation.
Log Work
Open test issues and log work using the work log interface. Verify that work logs create successfully and that time spent accumulates correctly on issues.
Test various time formats (hours, minutes, days) to ensure they convert properly according to your configuration. Log work with descriptions and without to verify required field settings work correctly.
Edit and Delete Work Logs
Test editing work log entries to ensure users with appropriate permissions can modify their entries. Attempt to edit other users' work logs to verify permission restrictions work correctly.
Test work log deletion if you've granted delete permissions. Verify that users can delete their own entries but not others' unless they have appropriate elevated permissions.
Review Time Tracking Display
View issues with logged time and verify that time tracking information displays correctly. Check that the time tracking bar shows accurate progress and that individual work logs appear in issue activity streams.
Test time tracking reports to ensure they include data from your test issues. Verify that time tracking fields appear in issue search results and can be used in filters.
Training Team Members
After configuration and testing, train team members on time tracking expectations and processes.
Document Time Tracking Procedures
Create documentation explaining how to log time in your Jira instance. Include specifics about when to log time, what level of detail to include in work log descriptions, and which time formats to use.
Provide examples of good work log entries showing appropriate detail and formatting. Examples help team members understand expectations better than abstract guidelines.
Conduct Training Sessions
Hold training sessions demonstrating time tracking workflows. Show how to log work, edit entries, and view time tracking information on issues.
Address questions about when and how to track time. Clarify whether time should be logged daily, weekly, or in real-time as work happens.
Create Quick Reference Materials
Develop quick reference guides showing the steps to log time. One-page instructions or short videos help team members who need reminders after initial training.
Include information about common time formats and conversion (how many hours equal a day based on your configuration) so team members can easily enter time accurately.
Monitoring and Adjusting
After rollout, monitor time tracking usage and adjust configuration as needed based on team feedback and actual usage patterns.
Check Compliance
Review whether team members are consistently logging time. Low compliance may indicate configuration issues, unclear expectations, or process problems that need addressing.
Identify which team members aren't logging time and understand why. Technical issues, unclear instructions, or lack of understanding might require different solutions than simple non-compliance.
Review Data Quality
Examine logged time for accuracy and appropriate detail. Work logs without descriptions, suspiciously round numbers (many entries of exactly 1 hour), or other patterns might indicate teams are estimating rather than tracking time accurately.
Address data quality issues through additional training, requirement adjustments, or process changes that make accurate time logging easier.
Gather Feedback
Ask team members about their time tracking experience. Identify friction points in the process and configuration changes that would make time tracking easier or more natural.
Be willing to adjust your approach based on feedback. The best time tracking configuration is one that teams actually use consistently, which may require iterating on your initial setup.
Adjust Configuration
Based on monitoring and feedback, refine your time tracking configuration. You might adjust required fields, change time format settings, or modify permissions based on real-world usage.
Configuration changes should aim to reduce friction while maintaining data quality. Balance your need for detailed time data against the burden that tracking places on team members.
Common Configuration Mistakes
Several common configuration mistakes can undermine time tracking effectiveness:
Requiring too many fields when logging work creates unnecessary friction. Keep required fields minimal to encourage consistent time logging.
Not training team members adequately leads to confusion and non-compliance. Invest time in proper training and documentation.
Setting unrealistic working hours configurations (like 10 hours per day) causes confusing calculations. Match your configuration to actual working patterns.
Restricting permissions too tightly prevents team members from logging time or correcting errors. Grant appropriate permissions for users' roles.
Omitting time tracking fields from necessary screens means team members can't access time tracking features. Verify fields appear where needed.
Not monitoring compliance after rollout means issues persist uncorrected. Regular monitoring helps identify and address problems early.